 Inquiry

 English
 Français
 Español
- Type:
- Industry News
- Date
- 2026-Jan-02
Industry News
Home / News / Industry News / Baby Safety Gate for Stairs: A Step-by-Step Hardware Installation Guide for Peace of Mind
Parents frequently choose a hardware-mounted Baby Safety Gate for Stairs when they want a stable barrier at the top of their staircase. Hardware installation involves attaching the gate directly to the wall, railing post, or other support surface, creating a firm anchor that relies on pressure alone. This step-by-step guide outlines the essential preparation, installation steps, and follow-up checks that families often discuss when sharing tips on safe home setup.
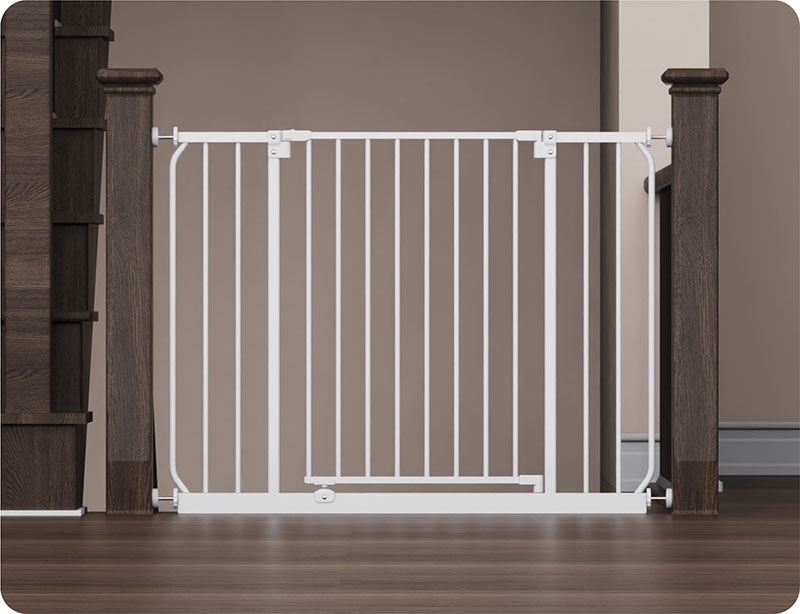
A screw-mounted gate provides reliable support because it remains securely fastened even under pressure. Children often grab, push, or shake barriers, and stair tops require reinforcement that does not shift over time. Since adults also use the gate multiple times a day, the mounting method must withstand regular movement and occasional bumps without loosening.
Families preparing for installation typically gather a few essential tools:
A drill suitable for the wall or banister surface, mounting brackets or hinge adaptors, Standard screws or long screws for deeper anchoring, A level for alignment, A pencil for marking, and Optional spacers for uneven walls.
Most gates include brackets, hinge components, and a latch. Parents recommend checking the components before starting to ensure that all parts are present.
Step one is assessing the width of the staircase opening and determining the height at which the gate should sit. Parents often place the top of the gate slightly above a child's chest level to prevent climbing attempts. Using a pencil, they mark the position of each bracket or hinge.
Hardware brackets are attached to solid material whenever possible. On drywall, parents often use wall anchors for stability. When mounting to wooden posts, screws typically provide strong support. Parents stress the importance of ensuring the brackets sit level both horizontally and vertically.
3. Install Hinges and Attach the Gate
After the brackets are secured, the gate is connected using the provided hinge pins or screws. The gate should swing freely without scraping the floor or wall. Parents test the alignment during this step to ensure that the latch connects smoothly with the receiving bracket.
4. Adjust Swing Direction
The gate should open away from the staircase. Adjusting the hinge direction helps prevent unsafe outward swings over the stairwell. This orientation also supports easier traffic flow for adults moving through the home.
5. Confirm Locking Mechanism Performance
Once the gate is attached, the locking mechanism should be tested repeatedly. Parents try opening it with one hand, using the same motion they would during everyday use. A reliable lock should close securely without requiring excessive force.
Testing After Installation
Parents recommend applying gentle pressure from different angles to test stability. If the gate shifts or wobbles, screws should be tightened or re-positioned. Gates installed on uneven surfaces may require additional spacers to ensure consistent contact.
Parents also test whether children can lift the gate, reach the locking mechanism, or apply enough pressure to cause movement. Observing how the child interacts with the gate helps identify potential adjustments.
Ongoing Maintenance
Regular maintenance checks help preserve stability. Parents often inspect screws weekly during the early weeks after installation, then monthly once the gate has settled. Humidity, temperature changes, and frequent use may gradually loosen screws or shift alignment.
Locks should also be monitored to ensure they engage smoothly. If any part of the gate begins to squeak or stick, lubrication or realignment may be needed.
A carefully installed Baby Safety Gate for Stairs supports a safer household environment by providing a firm barrier at critical locations. Through proper measuring, mounting, testing, and maintenance, families can ensure that the gate functions smoothly throughout the child’s active early years.


Baby Safety Pen & Pet Gate Factory


